1. Create a new patient in the onboarding functionality
- Surf to: https://patient-onboarding-admin.moveup.care.
- Fill out your moveUP login credentials and click “Login”.
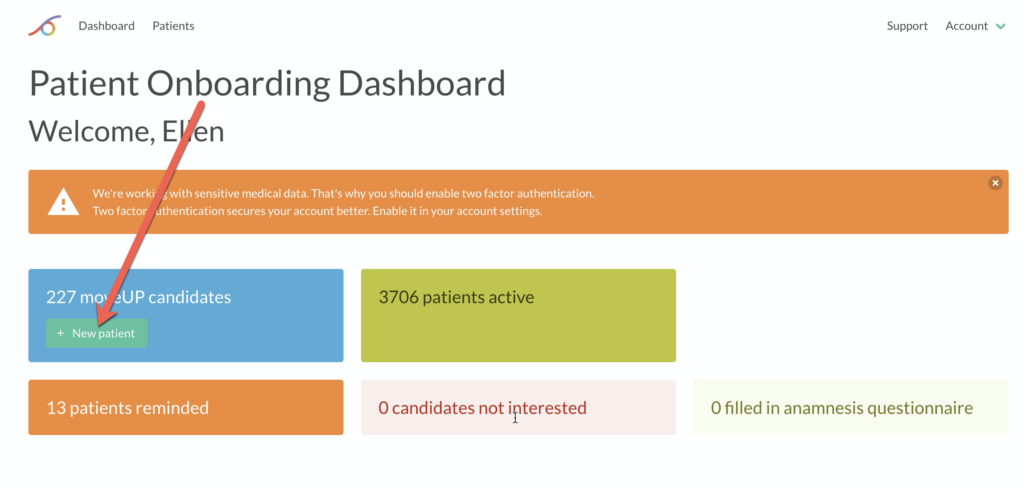
- Click “New patient”.
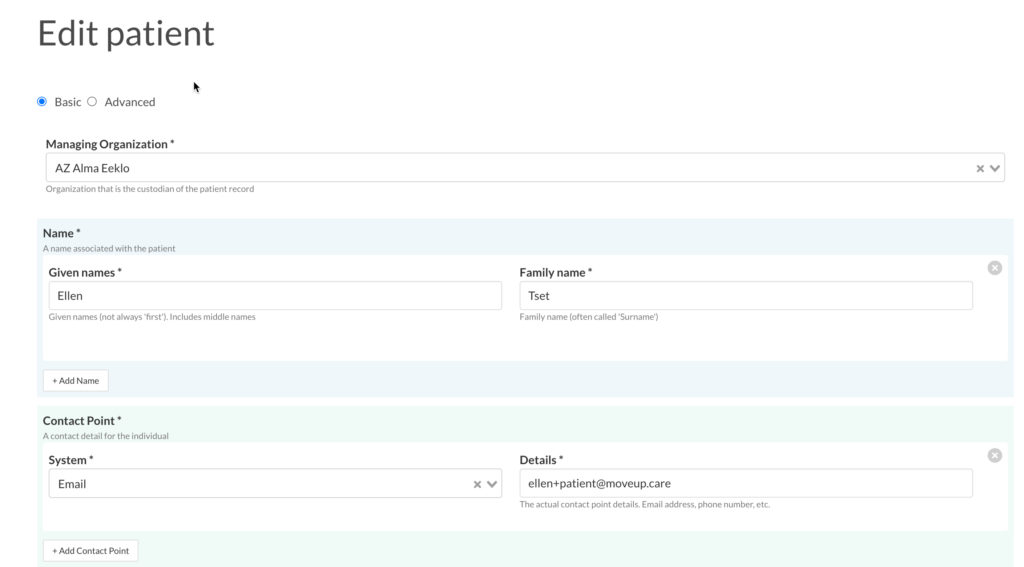
2. Fill out the patient’s details
- Fill out the patient’s details.
- Click ‘save’.

3. Add a new care plan to the patient
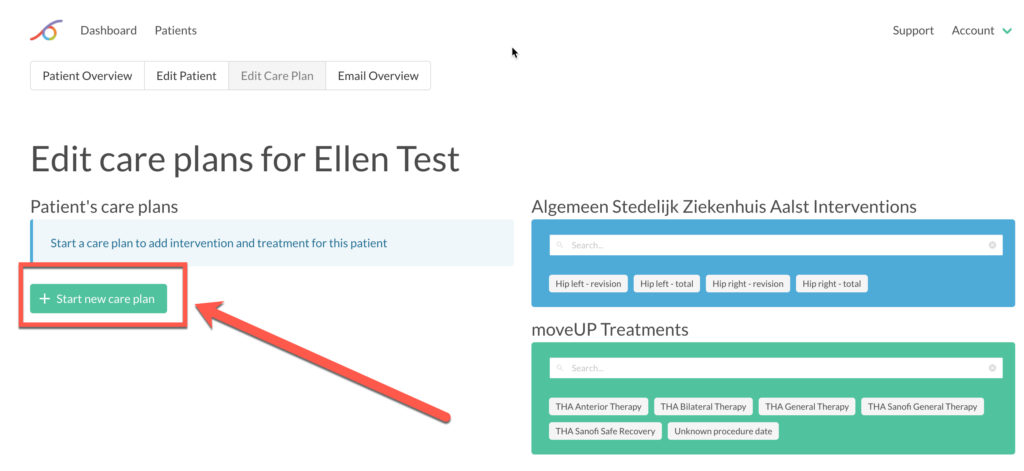
- The “Edit Care Plan” tab will automatically open after entering patient’s details.
- Click “Start new care plan”.
- Drag and drop an intervention to the care plan.
- Fill out the intervention date (e.g.: operation date) and the name of the treating doctor (e.g.: surgeon).
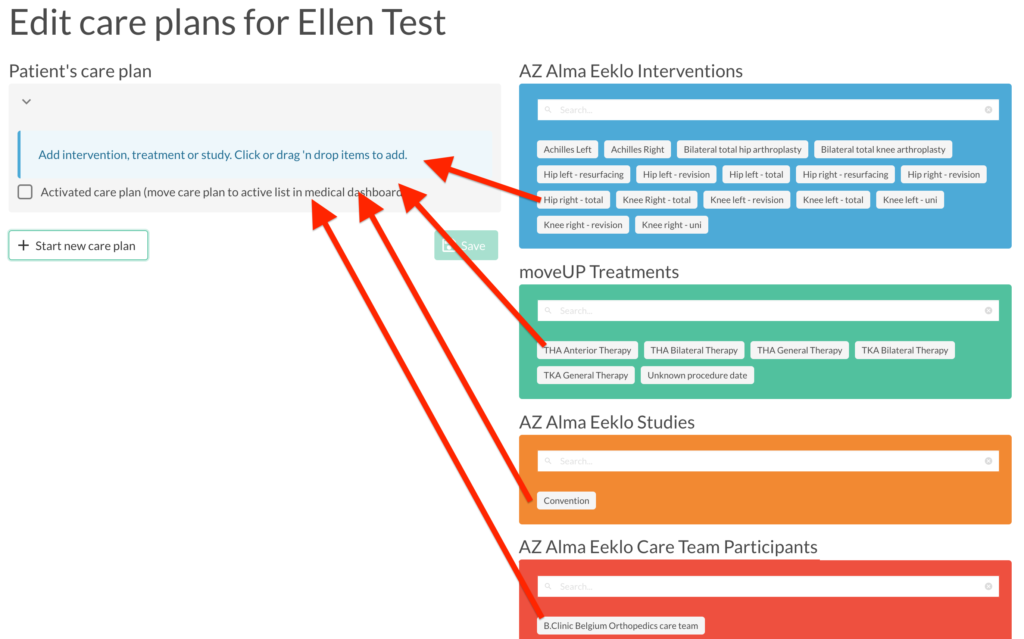
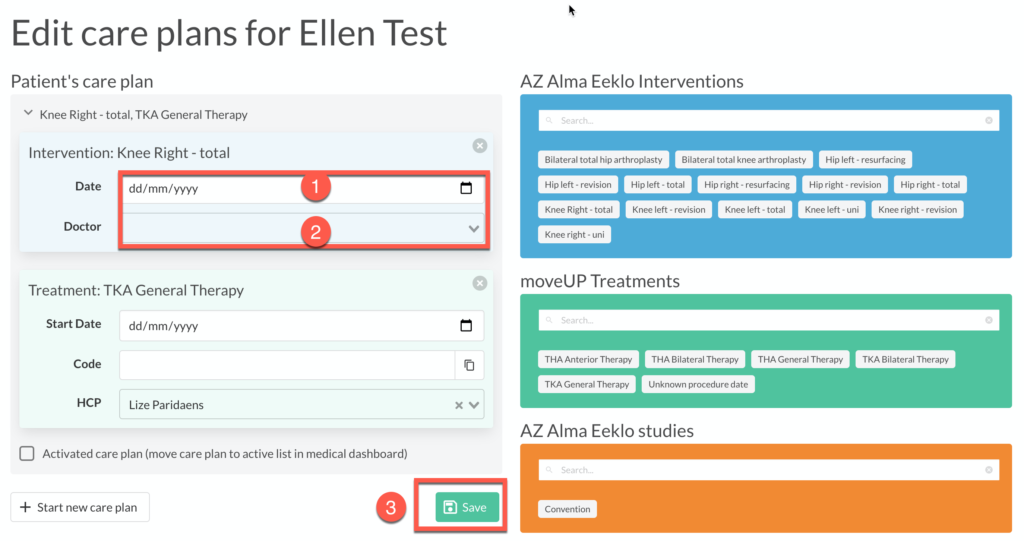
- Drag and drop a moveUP treatment.
- REMARK: The treatment’s start date is set automatically to today’s date if you don’t fill it out. In most cases, it is not needed to set a date. This is only done in case the intervention or intervention date is not yet known.
- Drag and drop a study if applicable.
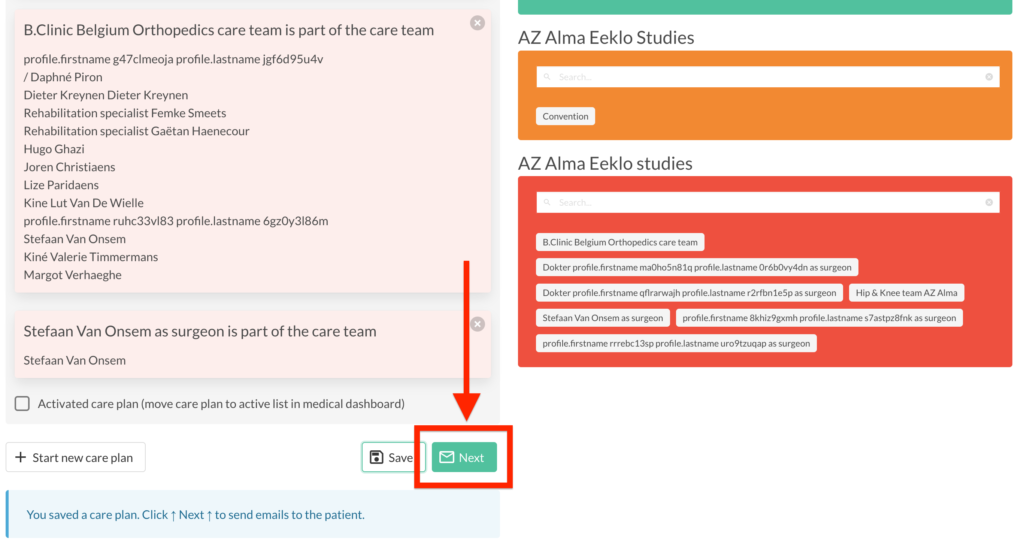
- Drag and drop care team(s) or care team participants.
- Click ‘save’.
4. Send an invitation email to patients
- Once a care plan is saved, click on “Next”.
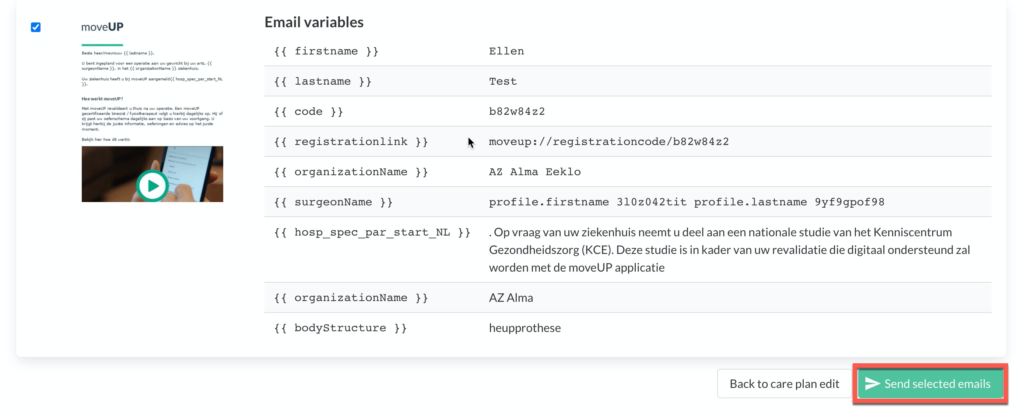
- A template of the email(s) that will be sent to the patient is shown.
- Click on “Send selected email(s)” to send the emails to the patient.
- A message “mails were sent” will appear for a few seconds so you know the mails are successfully sent.

5. What happens next?
The patient will receive an invitation email with
- Instructions how to install moveUP— With a short introduction of moveUP, information link on pricing and instructions on how to install moveUP with login details, and a link to the quick start guide.
In case the moveUP treatment of your patient also uses an activity tracker, the patient will receive a second email with :
- Link to order activity tracker and confirm his/her subscription— With an order form for the activity tracker.
