
Step 1: As a healthcare provider you log in to the healthcare platform
Step 2: Open the patient’s details by double clicking or clicking “details” on the patient overview
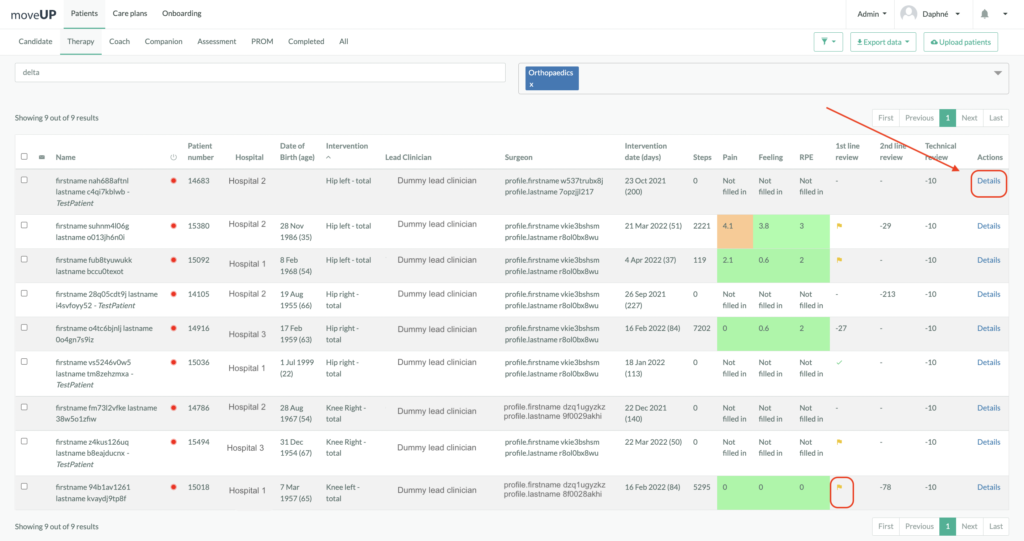
Step 3: Check patient’s parameters on the patient’s details
The patient’s details gives you a clear overview on the patient’s status. It allows you to monitor the patient’s parameters to:
- Identify complications at an early stage
- Check up on the compliance of the postoperative prescriptions (use of walking aids, medication, activities.)

- Have a continuous view on the evolution of activity and patient’s reported pain, swelling, stiffness, joint warmth and general feeling. Check the graphs and the answers to the daily questionnaires :

- Have feedback about the % of executed exercises, the RPE as well as the activity of the patient based on the number of steps. Evaluate the patient’s reported data over time and in relation to the preoperative data.

- Check the evolution of your patient based on the last video he/she sent. If you want to monitor his/her evolution, you can still add a new request.


Step 4: Personalize the patient’s care plan
While taking into account the patient’s parameters and the postoperative protocol you :
- Adjust the exercise scheme for the coming days based on patient’s needs : click on the 3 bullets to adapt the intensity of an exercise. You can also adapt it for the next days by clicking on ‘advance settings’. In this example, ‘heel raise’ exercise has been added every 2 days from day 21 to 25. The intensity has been adapted to 15 instead of 10.

- Adjust the step limit for the coming days to aim for a progressive increase and to prevent overloading
3 possibilities :
- Click on ‘save’ and you will update the day of today => one day only.
- Click on ‘save & update previous + future days’ to update the next days => to put the same number for the next days.
- Make a progression of the step limit max for the next days : go to the day chosen and put the number of steps you want the patient to reach and click on ‘Save & update previous + future days’, it will calculate automatically the progression of the steps until your chosen day.
For example : you are on day 20 with a max 2000 steps and you would like the patient to increase its number of steps by 100 each day during 1 week. You have to go to day 27 and put 2700 steps and click on ‘Save & update previous + future days’. You will see automatically the number of steps calculated during that time period.

Step 5: Coach, motivate or answer questions via the messaging functionality
Via the messaging functionality you will provide the patient with personalized advices, motivation and answers on his/her questions.
The messaging function gives you time-based message suggestions and you can access frequently used templates.

Step 6 : Check the messages in the log to keep your colleagues posted or to find information
You can select the type of message you need or want to share. By default, ‘All’ is selected. If you want to see more information about the activity tracker (e.g synchronization of steps), you have to select ‘Activity tracker’.


Step 7: Register the follow up
By clicking on the ‘2nd line review’, you can escalate to second line doctors when needed.

Finally, register your follow up by validating the first line review.

Digital follow up in a nutshell
- Open the patient details
- View daily parameters in table and graphs
- Check the log and solve the flags if any
- Adjust exercise scheme for the coming days if necessary
- Adjust step limit for the coming days if necessary
- Coach, motivate and answer questions via the messaging functionality
- Register your follow up using the first line review button or escalate to 2nd line if necessary
- At the end of the day all patients should be validated or flagged